Showing posts with label Flowers. Show all posts

May 7, 2020

No Guts, No Glory ... or, Repurposing Throwaways as Planters

I've still been busy starting more seeds, but since it was a cloudy and rainy day yesterday, I took some time to finally get the coleus and impatiens into their forever homes in the containers in front of the house.  I'm surprised they survived as good as they did in the tiny pots, especially since I bought the coleus on the 'scratch and dent' rack at Lowe's on sale.  Even being root bound, they look amazing.

Just prior to planting

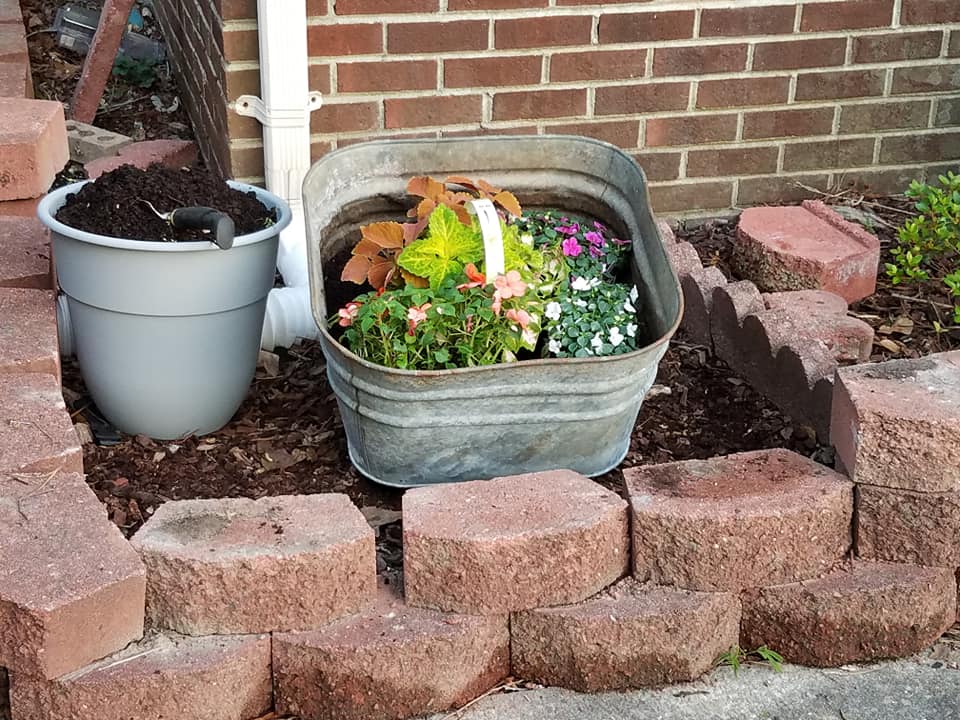
I have a fire pit in the backyard, but since I never use it for its intended purpose, I took the 'guts' out of it, and put flowers in the remaining block structure instead.  The guts (the piece that looks like a giant wok) was rusted through in several places so I almost threw it out, but then had an a-ha moment and decided to put flowers in it too.  I planted the three different variations of coleus and impatiens in that and my old washtub, but it's the fire pit planter I'll share photos of today.

The parts that were rusted through were big enough that I knew it wouldn't keep the dirt from falling through, so I put a layer of weed cloth in it first.

Too hole-y to hold the dirt

Dirt in place
Now to decide what goes where
Results
Bit of color near the porch

It was chilly overnight, and temps are still going to be lower than normal for a couple of days, but they all survived ok, and look great this morning.  


I put a brick under each of the back legs to tilt it forward just a little, and I'm really happy with the way it looks so far.   I need to decide on mulch for a finishing touch, and since it's a shallow container, that should also help keep moisture in.  I tried not to crowd it too much in hopes that the roots would be able to spread out, if not down, so hopefully the plants will forgive me for, and tolerate, the lack of depth.

Keep an eye out for my post about the old wash tub.  I'm pretty pleased with that project too.

~ Marie Anne

April 25, 2020

Gardening Means Having to Be Flexible

I ended up visiting with a friend yesterday so I didn't get the goodies from Lowe's planted in the front containers yet.  We traded some plants and seeds, and I came home with a cute little sedum plant that I think will make a good addition to the containers, so I'm excited to get my hands back in the dirt today.


I did try to get the antique washtub situated in a good spot, but without much success.  Because of its age, it's no longer square or very sturdy, so getting it to sit well on solid ground has always been a challenge.  No matter how I maneuvered it, I was never able to get more than three of the legs to make contact, and that wasn't going to work.  I even dragged regular and landscaping bricks over there so the legs would be on something solid, but all of my efforts were for naught.  It doesn't help that the tub itself doesn't sit square on the base either, so even if I think the legs are sitting solidly enough, once I put the tub on, everything moves and I have to start over.

I finally threw in the towel and thought maybe I'd just set the tub itself on the ground without the base.  It's not what I want, but I guess that's what it's going to be if I want to use the tub at all.  I leaned it on a couple of bricks to get a bit of a tilt to it, but left it at that for the night and will play with it again today and see if I can come up with something a little more to my liking, and get the plants into their new homes.

Lonely washtub waiting to be filled
Plants waiting to get their roots in the dirt

I'm certainly not going to get rid of the base of the washtub, so I need to figure out what to do with that too.  Any ideas?


Lonely, naked base needs a new purpose


~ Marie Anne

June 7, 2012

With Molly and Jethro, Off on a Jaunt

There's nothing really exciting to see around here, but since I'm easy to please, I still enjoy it when Molly and Jethro take me for a walk.  There is plenty of flora and fauna in our little neck of the woods, and I tried to capture a little of it with my cell phone camera to share with you.

There were more pictures of various wildflowers and such, but my cell phone is being ornery and not letting me have them.  Some of the photos aren't the best, but here's what I was able to get.


I hope you enjoyed our little jaunt!


May 28, 2012

May 27, 2012

What a Difference a Year Makes!

Well, I guess it's been two years or better.

I was plundering through old photos today, looking for some 'before' pics to add to another post I was going to write, and came across one I'd forgotten.

This is a photo of what one of the flower beds looked like more than two years ago.  Ewwww.

First things to go were that big honking tree that was half dead and the poor, sickly-looking variegated shrub in the middle.  I dug up and moved one of the Rose of Sharon from the back yard and added a few more hosta, but that was about it.

(Click photos to enlarge)


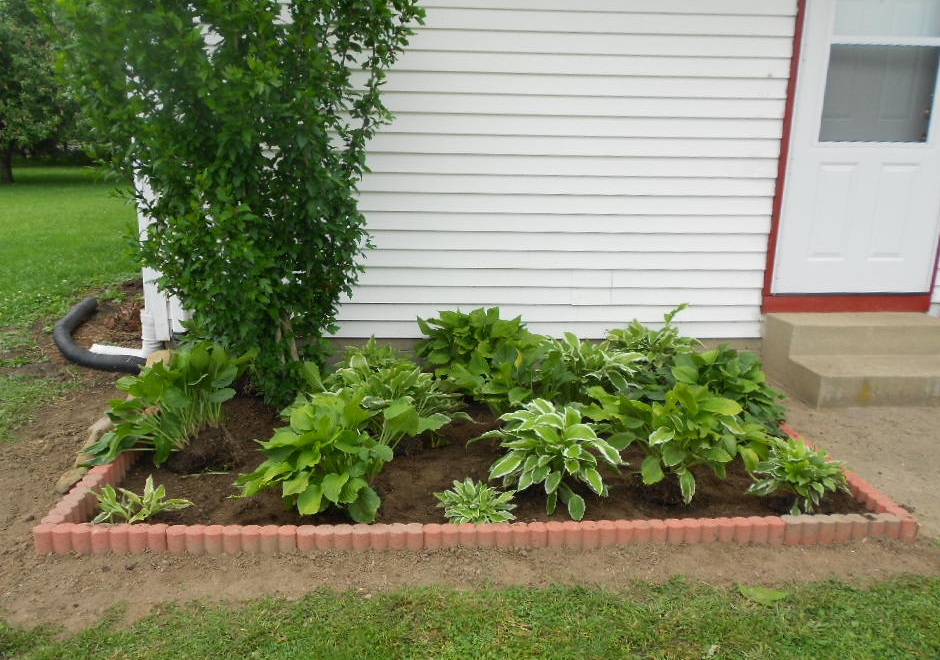
Last year a friend replaced my front door and also got rid of the landscaping timbers and put new edging around the space for me.  It was much better, but still not 'done'.


Just a little different, huh?


May 26, 2012

Japanese Quince Bush Isn't Quince-ing This Year

The crazy weather we've had this year with mild winter, early spring, then a few days of below freezing temps after everything started to sprout has left several things lacking around here.


My Japanese Quince bush in the back yard is usually the first to bud, right around the time forsythia makes its showing, and sometimes before.  This year, everything started to green up nicely, but it never did flower.  It's normally come and gone by now and I'm sure no flowers means no quince fruit.  It's a huge shrub,  probably 8ft tall or better and at least that wide, and there are two lonely little flowers side by side at the top of the bush.  It should have been a mass of color in a peach-y pink and I was truly disappointed, especially since I moved my home office to where I see out that window from my desk.

(click photos to enlarge)


Two lonely flowers on my Japanese Quince bush

Isn't this a sad sight?  My poor Quince bush!

Since the quince isn't much to look at, I thought I'd stick something else outside this window for a bit of color.  I found a nice double shepherd's hook and hanging basket at Aldi's a few weeks back (the basket was only $2.99, I believe), and I picked up some flowers on sale at Lowe's when I got the garden soil and mulch for the hosta bed I just finished.   Added a pretty glass hummingbird feeder for the other hook, and here's the finished product.  It's a lot fuller and prettier than the photo shows, but I never could get the light just right to make the colors pop, no matter what angle I shot from.


It's a far cry from a fully bloomed Japanese Quince, but it's better than nothing. I've made a promise to myself that I'm going to spend more time outside in the good weather rather than chained to this desk anyway.

Let's see just how long that lasts.


May 25, 2012

Putting the Hosta Bed to Bed

I posted a few days ago on where I attacked the Canadian Thistle, and again when my hosta bed was almost finished.  The only thing left to do was mulch, and mulch I did.

(Click photos to enlarge.  It's worth the closer look!)

Ready to tackle the last step - mulch

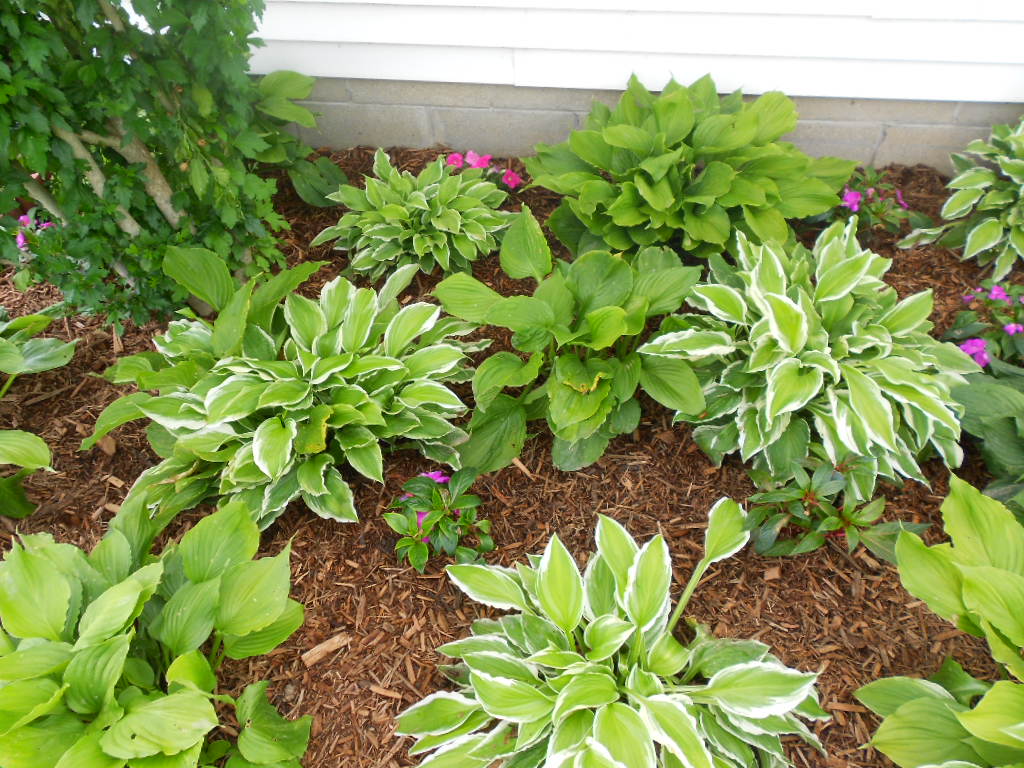
I've got one last little thing to add to this little garden area, but it won't be in until next week.  I'll share that surprise later, but until then, here's the finished hosta bed with a few impatiens tucked in.


I'm pretty pleased with the way this turned out.  Now to keep the cats from using it as a litter box and digging up my hard work.

Many more home and garden projects still to tackle, so watch for what's up next!


May 23, 2012

Hosta Bed Round 2

I posted yesterday about what I was doing in my hosta bed to (hopefully) get rid of the Canadian Thistle for good.  After taking the hosta out and digging up the thistle and other weeds, the little garden by my front door was ready to be amended with good soil and for the hosta to be replanted.

(click photos to enlarge)

This is where I left off the night before

Let's add some good Miracle Grow garden soil 

.. and spread it out real nice

... until it looks like this.


Make sure to get rid of the thistle and other weeds 

... then take the hosta


... and start placing it in the flower bed

... and reposition as necessary.
(Warning:  still step can take a LONG time)

Move this one over here, and swap that one with this one

... until you think you have them all just right.


Add a few pops of color with impatiens 
... and the hosta bed is done.


Give it a bit of a drink before retiring for the night


... and wake up to bright and cheerful plants.


All that's left to do now is mulch, and I think I'll wait a day or two to let everything settle in good first.

I fixed this particular bed last year, but life got in the way and I didn't tend to it as much as it needed, and I paid the price for it.  It took a bit of work, but I'm very happy with the way it turned out.  If the Canadian Thistle doesn't get a foothold again, it should be much easier to maintain after I get the mulch in.

More projects to follow!


May 22, 2012

Canadian Thistle? You're History - I Hope!

Hosta.  Everywhere.  Problem is, so is Canadian Thistle.

There were established hosta beds on this property when I bought it three years ago, and two years in a row I sold and gave away a lot of it, and still have plenty left for what I need.  I've dug up, divided, and moved much of it more times than I care to admit, and they're still going strong.  Can't kill this stuff.

Unfortunately, the same can be said of the Canadian thistle that has invaded the area, particularly my one hosta bed in the front corner of my house.  I've dug it up almost daily, digging as deep as I can to get to the runner, and it's been a fruitless effort thus far.  Nothing seems to work because I can't get to the root of it (literally).

I'm tired of wasting time every day with it, but if it's not tended to, it runs rampant, so time to bring out the big guns.

I wanted to rearrange the hosta and perhaps stick in an annual or two, so decided to just dig up the whole bed again and start over.

(Click photos to enlarge)
Here's what I started with

There's no way to dig up that thistle without
 digging up and splitting the whole plant

The Canadian Thistle is everywhere!


Hosta gone ...

... to its temporary home on a tarp.


Now to work on getting rid of the thistle

I'm getting there

Almost done

Now to fix border, amend soil, and replant

This is where I had to leave off last night. It was threatening rain a couple of hours earlier than predicted, so no time to get garden soil and the hosta back in there properly before it hit. It's supposed to rain again this afternoon and evening, so I'm going to try to get out there and put things back in place before it does.

Lots more to do, so stay tuned for more before and after shots of other projects.

(Round 2 of the hosta bed challenge already posted).